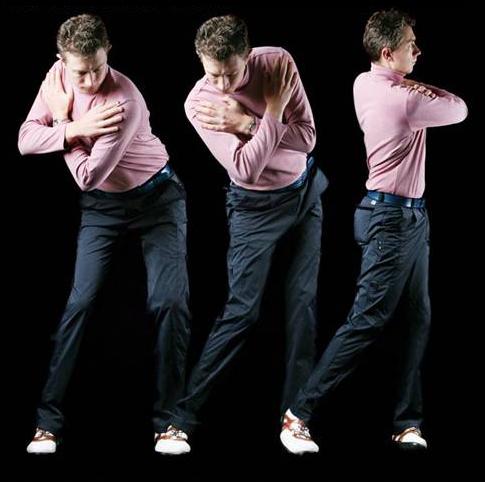
Golf Swing Pivot
The Engine of the Golf Swing
You might see that this article is linked to almost every category. This is because a poor pivot can create nearly every swing fault. It really is the engine of the swing. The problem is, when I am at a local range, and I look down the line of players practicing, what I see is that most are working on aspects of their swing like the takeaway, wrist cocking, flatter arms, higher arms, etc. In fact, nearly everyone is working on something to do with the position of the arms and club. I will be the first to admit that at the right time these are important; unfortunately, most players have bad posture and a bad pivot, making the correct positioning of the arms and club very difficult. Yes, the arms and club can compensate for a bad pivot with enough practice, but why have extra complications in your swing creating problems and inconsistencies?
The title is “Pivot-The Engine of the Swing” and there is nothing truer. It creates energy and speed, and it allows for the arms and club to swing naturally into the correct positions. If the body is out of position, everything else is also out of position, so spend time working on it. Practice with purpose and an understanding of why you are working on this element.
The Basic Pivot Concept
I like to think about the pivot like this. Your feet have the least amount of movement and your shoulders have the most amount of movement, so the amount of movement slowly increases the further you go up the body.
EXPLAINED: Your knees should move a little but provide resistance against the turning of the hips. Your hips should move a little more than your knees but provide resistance against the turning of the shoulders; this is what coaches refer to as coiling.
Follow this step by step exercise:
1) Take your address posture, placing your left hand on your right shoulder and your right hand on your left shoulder.
2) Remember the concept – the ground provides the resistance and the coil increases the further up your body you go.
3) Start your pivot with your chest and turn it through to 90 degrees with your left shoulder underneath your chin.
4)In turning your chest 90 degrees, feel the resistance from the hips. Don t just let them go with the shoulders. They should only turn around 45 degrees. For sure, you will feel a stretch; you should! Also check that you have kept the posture angles that you had in address.

5)The key move, the transition. A good transition starts with the left hip moving towards the target, putting pressure on the ground underneath your left foot. It is a dynamic movement which cannot be shown in pictures. I sometimes tell students to feel like they are breaking ice under their left foot in this key move.
6)Now, you are in position where you’re left hip can continue to lead in the down swing and your chest can unwind with your right shoulder working underneath your chin.
7)At impact, your left hip should be lined up over your left foot with your chest square or slightly open to the target and your hips more open. Again, you should still be in the angles that you started address in. Practice your transition and move to impact with a wall against your left side and your left side bumping into the wall.
8)Now, simply complete your finish by turning your right shoulder to the target with your right foot rolling up.
Start by going through these positions and movements slowly until comfortable with full awareness of the moves. Add speed and a little “oil” until it is the same speed as your swing.
A good pivot that creates coils and maintains its angles at speed requires a certain amount of flexibility and strength in the correct areas, so if you find any of the movements difficult, I recommend that you find your local TPI certified instructor www.mytpi.com and take a physical screening. Remember, it is the engine and you must be able to get into 5th gear!

